How To Hit Better Volleys In Tennis: A Step‑By‑Step Guide
Most recreational tennis players have been taught volleys incorrectly-or barely taught at all. The result is awkward lunging, late contact, and a net game that feels like a liability instead of a weapon. This guide is the best step-by-step, court-tested system for building volleys that actually hold up under match pressure.
Key Takeaways
- Great volleys in tennis start with balance and an early split step, not with the racket swing. Get your feet right and the hands follow.
- Both the forehand volley and backhand volley are short, forward catches-not big swings or hard punches. The volley should be a short, compact forward motion that relies on timing over force.
- Moving your body through contact with the ball creates power, consistency, and depth. Powerful volleys come from movement, not racket speed.
- Drilling specific patterns and using PlayYourCourt coaching and video lessons accelerates improvement far more than random net practice ever will.
Why Focus On Volley Technique in Tennis?
Nate, a PlayYourCourt pro who has spent over 15 years on court teaching tennis players of every level how to play smarter, more complete tennis has logged well over 5,000 on-court lesson hours since 2010, and at least 30% of that time has been dedicated to volley technique and net play patterns-from club-level adults who've never been comfortable at the net to high-performance juniors preparing for college recruiting. He has written this guide from this experience.
As a PlayYourCourt pro, Nate sees the same volley mistakes across adult tennis and youth tennis every single week. That's why I built this definitive progression. Whether you take private lessons on local courts, use our video coaching breakdowns, or run through structured drills inside the membership, this system works. I track my students' match stats obsessively. We've watched USTA league players improve their net-point win percentage from roughly 40% to over 55% after just 8–10 targeted volley sessions. That kind of jump changes match outcomes fast.
The Foundation: Ready Position, Grip, And Split Step
Better volleys start before the ball crosses the net. Your stance, grip, and split step are non-negotiables-skip any one of them and everything downstream falls apart.
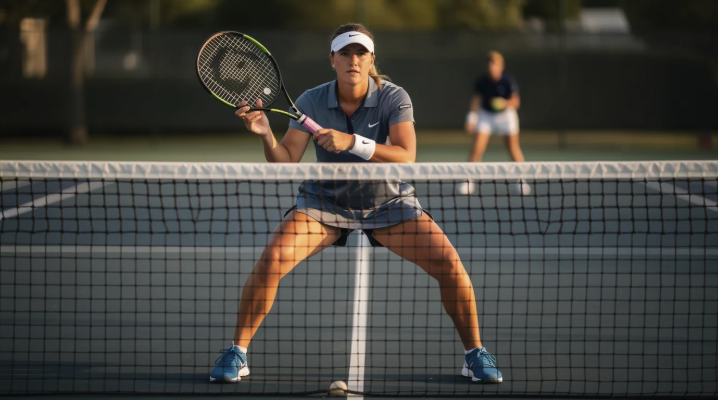
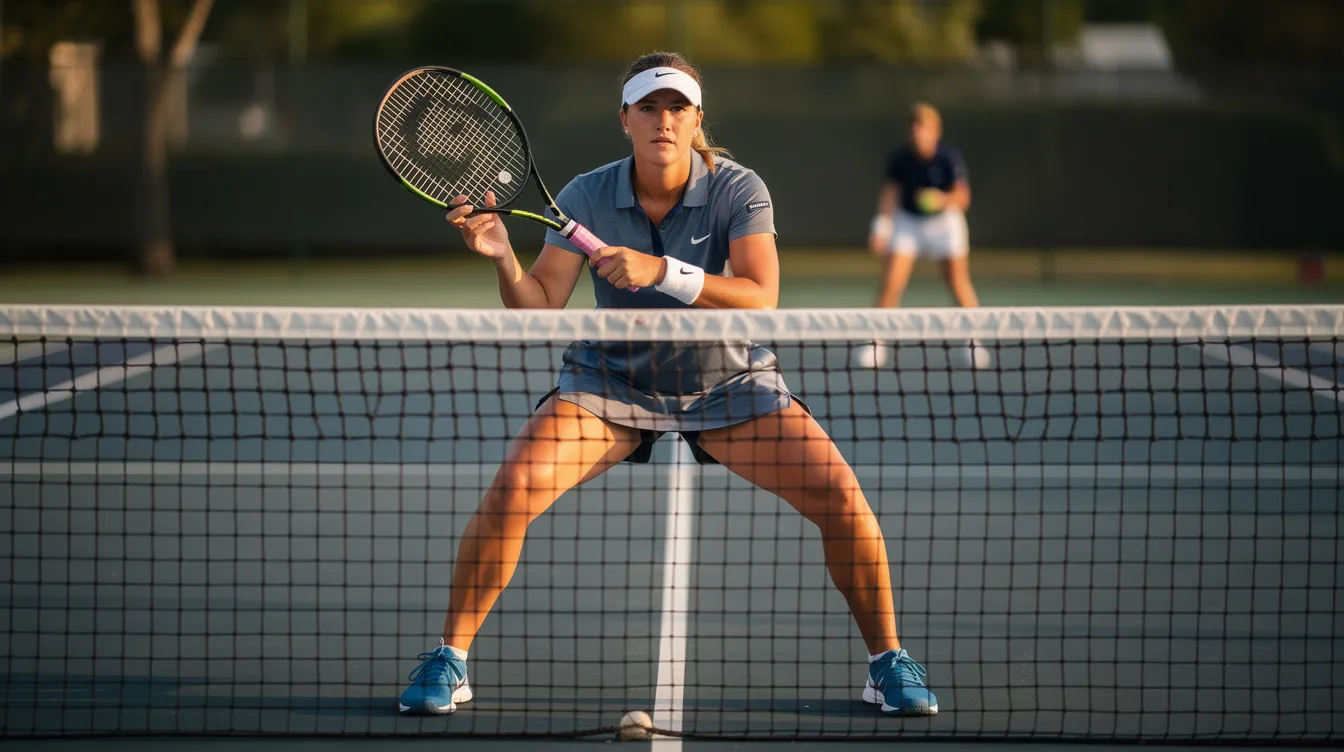
Your volley ready position should look like this: feet just wider than shoulders, knees flexed, weight on the balls of the feet, chest facing the net. The racket head sits above the wrist and is centered in front of the chest. The basic volley position requires shoulders slightly forward, creating a slight athletic lean toward the net rather than standing upright.
Use a continental grip-sometimes called a hammer grip-for improved volley accuracy. Place your heel pad and index knuckle on bevel 2, as if you were holding a hammer to drive a nail. This lets you play both the forehand volley and backhand volley without a grip change, saving precious reaction time. Use a Continental grip for both forehand and backhand volleys and never switch mid-rally.
The split step at the net is a small hop timed as the opponent makes contact with the incoming ball. Perform a split step as your opponent hits the ball, landing softly so you can push explosively in any direction. Unlike a baseline split step (more vertical and neutral), your net split step should carry a slight forward drift. A forward split step improves volley power and enhances volley timing at the net by keeping your momentum aimed where you need it-forward. For a visual walkthrough, check out our split step footwork drill tutorial.
Step‑By‑Step Volley Mechanics: The "Catch And Block" Model
Here's the central thesis that many players get wrong: a good volley feels like catching and slightly guiding the ball with a firm but relaxed arm-not swinging through it like a groundstroke.
The sequence is straightforward:
- Execute your split step as the opponent strikes.
- Turn your shoulders quickly toward the ball side.
- Set the racquet head slightly outside and in front of the hitting shoulder.
- Move forward into contact with the ball using a small step.
- Follow through short and controlled toward your intended target.
Keep the racket head above the wrist for stability throughout. Avoid large backswings when hitting volleys-the racket travels only a short distance, mostly forward and slightly down or level. Improving tennis volleys requires a focus on compact strokes, not length of swing. Research from the ITF confirms that advanced players generate greater racket speed with shorter swing lengths, especially when close to the net.
Contact with the ball should be made in front of the body-roughly in front of your front hip-with the arm slightly bent, wrist laid back, and the racquet face angled toward your target. Use the speed of the opponent's ball to direct it back; you don't need to supply all the force yourself. Gradual acceleration towards the ball enhances precision rather than a sudden, jerky punch.
Why doesn't swinging like a groundstroke work? Because a long backswing means you hit the ball late, mishits increase under pressure, and the arm does all the work. Both forehand and backhand volleys use this same catch and block logic-just on opposite sides of the body.
Common Volley Mistakes (And Why They Don't Work)
Think of this section as a diagnostic checklist. If you recognize yourself in any of these, you've found your quickest path to improvement.
The most frequent errors I see:
- Taking a big backswing (players often hit volleys late due to backswing-the racquet travels too far and the contact point shifts behind the body)
- Standing upright and flat-footed instead of staying athletic
- Changing grips between forehand volley and backhand volley
- Swinging across the body instead of forward
- Dropping the racket head below the wrist at contact, which produces pop-ups
The physics are simple: a big swing causes late contact because the racket has too much distance to cover. A low racquet head angles the strings upward, launching the ball. A tight grip and forced punch create tension through the arm and reduce feel. EMG studies on muscle activation show that over-tension in the wrist and forearm before impact actively hurts control and raises injury risk.
Here's the real problem most recreational players face: they approach the net on the wrong ball-a neutral or losing shot-then blame their volley when they get passed. The mistake is decision-making and court position, not necessarily technique.
I often film players in slow motion for just 5 minutes, and they immediately see that they're preparing late and backing up at contact. These mistakes are fixable quickly with the right drills and awareness, especially when a coach or video feedback points them out.
Mastering The Forehand Volley
The forehand volley is the easier side for most right-handed tennis players, but ironically, it's the side where they over-swing the most because the arm feels "free."
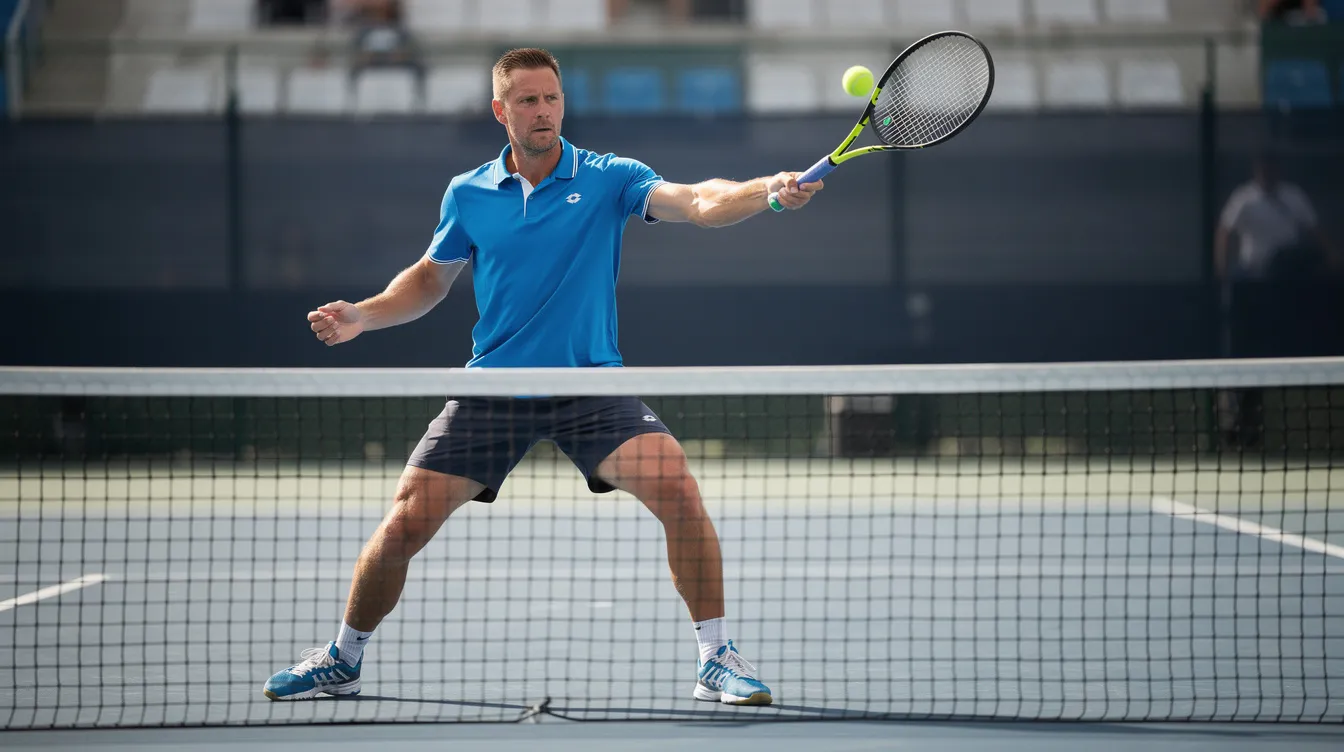
From the split step, pivot your outside foot slightly, rotate your shoulders, and move the hitting hand to about shoulder height, slightly outside the hitting shoulder. The racket path should be short and slightly forward-a long follow-through improves volley accuracy, but it's a controlled extension toward the target, not a wraparound finish. Your left hand (for right-handers) helps stabilize the racquet early in the move by staying on the throat.
Here's the cue I use with students: imagine you're trying to catch a ball tossed to your right shoulder. That reaching-and-absorbing motion is the forehand volley feel. "Freeze" the racquet just after contact, strings aimed at the intended target.
For different ball heights:
- High forehand volleys: Contact slightly higher with a firmer wrist, aiming to punch down with authority.
- Low volleys: Stay low with a stable base to handle low volleys-bend the knees instead of dropping the racket head, and use more underspin to lift the ball safely over the net.
A simple drill: feed 10–20 balls while the player stands two steps from the net, focusing only on early racket prep and clean, centered contact. No big follow-through allowed.
Building A Reliable Backhand Volley
The backhand volley is the tougher side for most players, but it can become a genuine weapon if the technique is simplified rather than complicated.
From the split step, step with the outside foot and turn the shoulders so the non-dominant shoulder points toward the ball. Keep the continental grip-no changes. The racquet head stays above the wrist, slightly outside the front shoulder. Your left hand (for right-handers) rests on the racquet throat early for stability, then releases just before contact.
The critical detail: keep the hitting elbow in front of the body and use a compact forward move. When the elbow creeps behind the rib cage, contact becomes late and floppy, and you lose good control of direction. Think of it as "placing a tray" toward the target with the strings-a small, firm motion, not a slap or flick.
Gradual racket acceleration improves volley precision on the backhand side especially, because the tendency is to rush and jab. Let the racquet speed build smoothly through contact.
An effective drill: have a partner lightly support their hand under the hitting elbow for a few feeds. This trains the arm to stay in front and compact. Once the feel clicks, remove the support and hit freely. You'll notice the backhand volley immediately feels more solid.
Footwork, Split Step Timing, And Using Your Body For Power
If I could change one thing about how most players approach their net game, it would be this: stop trying to generate power with your arm and start using your legs and body.
Transfer body weight into the volley with your outside leg. As you step through the shot, your body mass moves into the ball at roughly 90 degrees to your target line. Using body mass effectively enhances volley impact far more than swinging harder ever will. Transferring weight forward increases volley power-this is what makes Roger Federer's volleys look effortless.
The timing works like this: begin moving forward as the opponent sets up their shot. Land the split step as they strike. Then immediately explode toward the ball, with the first step already leaning forward. Early split step creates forward momentum for volleys, and that momentum does the heavy lifting.
The mistake I see constantly: players jump straight up or stand flat-footed, then lunge late with all the work done by the arm. They can't react quickly or change direction because their weight is on their heels.
A simple drill: Place a cone a step behind the service box line and another near the net. Practice split-stepping at the back marker, then moving forward through the volley to finish past the front marker. This trains the habit of moving forward through every shot. For more footwork-specific work, check out our tennis footwork techniques guide.
Choosing The Right Contact Point, Height, And Target
Elite volleyers look simple because they control where they meet the ball: in front, stable, and at the right height. Watching the ball improves timing and control during volleys, and it starts with keeping your eyes level and head still through impact.
The ideal contact point is with the arm comfortably away from the body (not cramped, not fully locked out), slightly in front of the front hip. Contact the ball in front of your body for better control-this single adjustment fixes half of all volley errors I see.
Adjustments by ball height:
| Ball Height | Priority | Technique Adjustment |
|---|---|---|
| High | Authority & angle | Punch down firmly, step in aggressively |
| Mid-court | Depth & direction | Focus on placement, aim deep |
| Low | Height & spin | Bend knees, add underspin, clear the net |
For target selection: aim for placement rather than power when volleying. In singles, aim deep cross-court to the open court or into the opponent's weaker wing. In doubles, aim at feet, at the seam between players, or at the body when they're close to the net. Watch the ball closely for better volley control and let it guide your aim toward the right spot.
Target drill: Mark 3–4 zones in the service boxes with tape. Hit 10 forehand and 10 backhand volleys to each zone, tracking makes and misses to build precision.
Drills To Train Feel, Control, And Accuracy
Here are five drills you can use immediately. Each one targets a specific element of the volley.
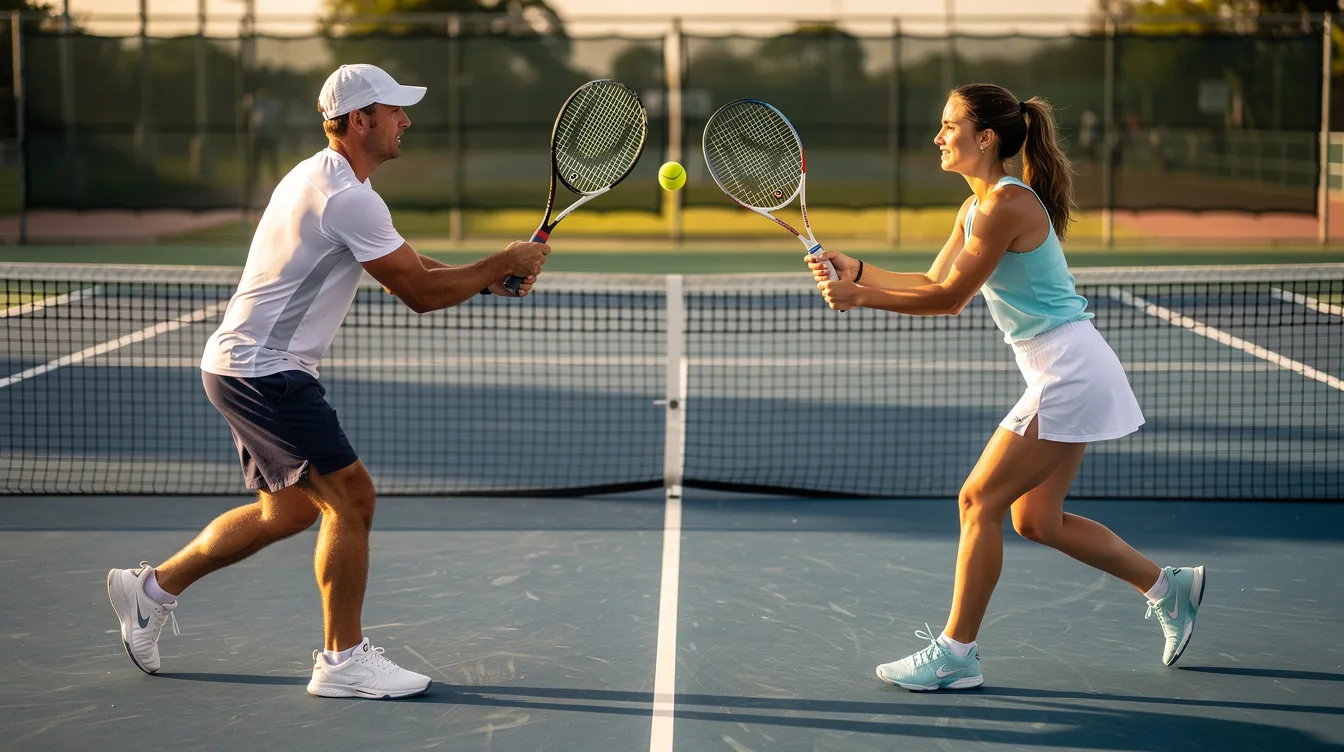
Drill 1 – Catch-And-Bump: A partner tosses balls from the opposite service line. First, catch 20 balls with your hand to feel the forward movement pattern. Catching the ball helps reprogram your volley technique. Then repeat holding the racket, softly blocking the ball back into the service box. Catching drills help improve volley timing more than almost anything else.
Drill 2 – Service-Box Volleys: Stand inside the service line while a coach feeds medium-paced balls. Focus on quiet hands and a long follow-through toward the target. Count how many in a row land deep in the box.
Drill 3 – Two-Touch Volley: On each feed, lightly block the ball up to yourself, then volley it over the net on the second contact. This trains soft hands, good ball control, and precise racquet face management.
Drill 4 – Directional Targets: Alternate forehand volley cross-court and backhand volley down the line to taped targets. This reinforces shoulder turn and stable strings toward the aim point.
Drill 5 – Slow Ball Touch: Have a partner feed intentionally slow balls from close range. The goal is to direct each slow ball back with control and depth, training feel rather than force.
For video walk-throughs of volley drills like these, our advanced tennis drills collection shows several of these in action.
When To Come Forward: Strategy, Stats, And Why Volleys Win Matches
Volley success is as much about choosing the right ball to come in on as it is about technique. You can have textbook mechanics and still lose if you approach on the wrong shot.
"Green-light" approach shots include:
- Deep balls that push the opponent behind the baseline
- Short balls you can attack and follow into the net
- Weak replies off your serve that give you positional advantage
By cutting off time at the net, you increase errors from the opponent and shorten points-critical for older players, league doubles, and long tournaments.
The numbers back this up. Research on college-level matches shows that match winners win approximately 65–67% of points played at the net, while match losers win only around 55–60% of their net points. In Grand Slams, studies show average net point won percentages hover between 62–65%.
In my own tracking of adult league players, those who increased net approaches from 5–8 per set to 12–15 per set often saw a 10–15% jump in overall points won, largely from more forced errors on passing shots and lobs. You win more by simply being there.
PlayYourCourt's practice partner matches and structured leagues give you the perfect environment to implement more net approaches under live scoring pressure.
Advanced Patterns And Pro‑Level Volley Inspiration
This section is for expert or competitive players who already volley competently but want patterns that resemble pro-level play.
Classic patterns worth mastering:
- Wide serve + first volley to open court (singles): Force the returner wide, then place a simple first volley into the space they vacated.
- Body serve + first volley at the feet (doubles): Jam the returner, then drop the first volley low at the net player's feet.
Pete Sampras built an entire career around this approach-a dominant serve setting up a relatively simple first volley, usually deep cross-court or into the open space, rather than risky sharp angles on the first touch.
For advanced shots, try the drop volley with softened grip pressure for touch (learn more about drop shots here), reflex volleys in doubles with minimal swing, and swing volleys from mid-court when the ball sits up high and slow. Each of these requires different force modulation, which is why gradual racket acceleration-not one fixed speed-matters.
I encourage players to film and review 1–2 matches focusing only on net points: where they make contact, what targets they choose, and how many volleys they need to finish a point. PlayYourCourt video coaching can break down these patterns frame-by-frame.
How PlayYourCourt Can Fast‑Track Your Volley Improvements
While this article gives you the blueprint, progress is dramatically faster when a coach watches and adjusts details in real time. A light racket allows faster movement at the net, but choosing the right one-and using it with proper technique-is something a pro can help you dial in quickly.
PlayYourCourt matches you with local pros who specialize in net play and can run structured volley clinics, private sessions, and doubles strategy lessons on courts near you. Members can also send video clips of their forehand volley and backhand volley for me or another certified pro to analyze, annotate, and return with specific drills and cues.
The membership also helps you find practice partners and match-play leagues where you can test your improved volley technique under pressure-no country club required. Additional perks include discounted tennis gear, flexible lesson scheduling for busy adults, and youth tennis programs that teach proper technique early.
Book a volley-focused lesson or upload a short video of your net play this week while these concepts are fresh.
Three Big Takeaways For Expert Players
- Movement Over Mechanics: At a high level, the biggest edge comes from earlier split steps, more aggressive court positioning, and moving forward through volleys-not changing the basic racket swing. Your feet and body create the power; your hands just direct it.
- Compact, Disciplined Contact: Elite volleyers keep the racquet in front, make contact early, and avoid swinging across the body. The fewer moving parts under pressure, the more consistent the results. Impact should be made in front of the body for control-always.
- Pattern-Based Net Play: Experts win with planned sequences-serve plus one, approach plus one-and specific targets, not random charges. Track your net-point percentages over several matches to measure improvement objectively.
If you're already competing at a high level and want frame-by-frame volley and net-strategy feedback, send me your match clips through PlayYourCourt's video coaching platform.
FAQ: Better Volleys In Tennis
These questions cover the most common "People Also Ask" topics about volleying that weren't fully addressed above.
What grip should I use for most tennis volleys?
The continental grip is the standard for almost all volleys. It allows seamless switching between the forehand volley, backhand volley, overheads, and half-volleys without changing your hand position. To find it, place your index knuckle and heel pad on bevel 2 of the racket handle-it should feel like holding a hammer.
I have my students shadow-swing at home with this grip for a few minutes each day to make it feel natural before live hitting. Once the continental grip is automatic, your reaction time at the net improves because you eliminate the need to adjust mid-point. If you're using a forehand or semi-western grip for volleys, that's likely the single biggest change you can make today.
How can I stop hitting my volleys into the net?
The three most common causes are: making contact too far back (behind the body), letting the racket head drop below the wrist, and trying to "hit down" too aggressively from mid-court when you don't have enough angle.
Concrete fixes:
- Focus on seeing the ball meet the strings in front of your body-not beside or behind it.
- Keep the racquet head slightly higher than your hand at contact for a stable racquet face.
- Aim deeper into the court with a flatter, more neutral string angle rather than forcing downward.
A troubleshooting drill: stand inside the service line and volley, aiming for a strip of court two racket lengths inside the baseline. This trains higher net clearance and teaches you to throw the ball deeper.
Is a punch volley ever correct, or should I always use a soft touch?
A punch is useful on high, easy balls you want to finish-especially when you're close to the net and the ball sits up. But it should not be your default feel when learning to hit volleys.
My progression: start with the catch-and-block feel for most balls, then layer in firmer, more aggressive contact on put-away opportunities once good control is solid. At club level, most points require controlled, slightly sliced volleys rather than full-force punches, because you'll receive a mix of low, dipping, and awkward balls. Save the punch for the ball that deserves it.
How often should I practice volleys to see real improvement?
I recommend two focused volley sessions per week of 15–20 minutes each, plus incorporating 5 minutes of net work at the end of regular hitting sessions. Consistency matters more than marathon practice days.
In my experience, players who stick to this schedule for 4–6 weeks see a noticeable jump in confidence at the net and a measurable increase in net-point win percentage. Use PlayYourCourt to schedule a monthly check-in lesson or video review so mechanical drift gets corrected before it becomes a permanent habit.
What's the best way to practice volleys if I don't have a hitting partner?
You have several effective solo options:
- Wall volleying: Stand 6–8 feet from a wall and volley continuously with compact swings. Practice wall volleying for improved reaction time and technique-it's one of the best solo drills that exist for net play.
- Self-feed catch-and-bump: Toss the ball up, let it bounce, and block it into a target zone on the ground, focusing on clean racquet face control.
- Shadow footwork: Practice split step and step-in patterns without a ball, grooving the movement habits your body needs.
Mark a "net line" and target boxes on the wall or ground to train height and direction, not just making contact. You can film these solo sessions with a phone and submit clips to PlayYourCourt's coaching team for technical feedback even without a live partner.
Keep Improving


Similar Posts
- Find Tennis Partners Fitness Home Page Feature Improve My Game Quality Family Time Tennis Tennis Tips for Kids
Reasons You Should Play Tennis
Thinking about learning to play tennis? Or maybe picking up a racket after years away from the sport? There’s so many reasons why you should! Read below our countdown of the top 10 reasons to play tennis brought to you by PlayTennis.com.
How To Get Started Playing Tennis
Read the 7 tips below on how to get started playing tennis: 1. Make the mental decision to begin [sc:optin-box-modal slug=”add-15″ linktext=’Bonus: Watch “Add 15 MPH To Your Forehand With This Simple Fix”‘ bgcolor=”F8F1DE” linkcolor=”000000″ ] Like anything else, you need to want to do something in order to do it. Maybe you’ve…
Beginner Tennis Lessons for Adults
Congratulations! If you’re reading this, you’ve made (or are on the verge of making) a great decision to be one of the millions out there taking beginner tennis lessons for adults. You can play tennis no matter how old you are. You’ve probably heard people say this a million times, and I’m going to say…
Wimbledon or World Cup? They actually have a lot in common
World Cup Fever? I’ll be honest. I caught it. This “illness” even trumped my Wimbledon viewing the past two weeks. But I’m okay with it. After all, the World Cup only comes once every four years. I am one of the growing number of Americans who love soccer—almost as much as I love tennis. It’s…
Featured Posts Find Tennis Partners Fitness Home Page Feature Improve My Game Quality Family Time Tennis13 Signs You Are Obsessed with Tennis
13. When someone asks about your partner, you immediately think of your doubles partner. Someone asks you about your partner and your response is something like, “Good, they’re finally getting their first serve in” or “Not bad, but I hate it when (s)he tries to do a Bryan Brothers chest bump.” It’s okay, as long…